M. I. Y. (Make It Yourself) - Camp Ditty Bag
M.I.Y. is back, it’s been a while, but in these strange times of social isolation and anxiety, we find much comfort in the process of making something - so we’re putting this out there so you can all get making too. We’ve been saving this camp ditty bag tutorial for a rainy day, and whilst it’s not literally raining right now, I think this situation counts as one massive rainy day.
So on with the show…..

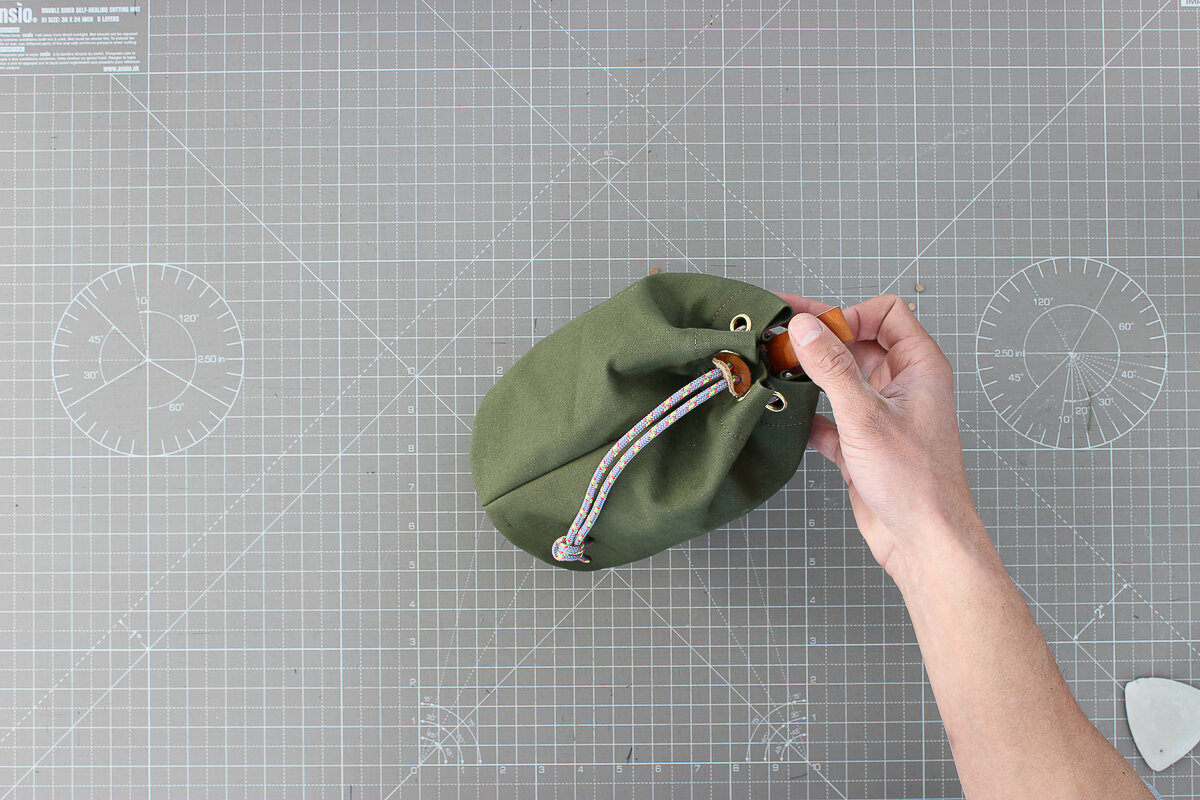
Have you ever lost your toothbrush down the bottom of your sleeping bag? Ever sat on the sunglasses that you stashed under your sleeping bag for safe keeping? Ever found a soggy box of matches, that you should have stashed in your sleeping bag, when all you want is a hot cuppa? Yep, I know - me too!! So this might just be the perfect bag making tutorial for you. A small handy bag that we've kept as simple as possible to make but without losing any of it's charm. A bag that you can hang inside your tent, or even from your belt, to keep all those small camp essential all in one place, never to be lost or sat on again!
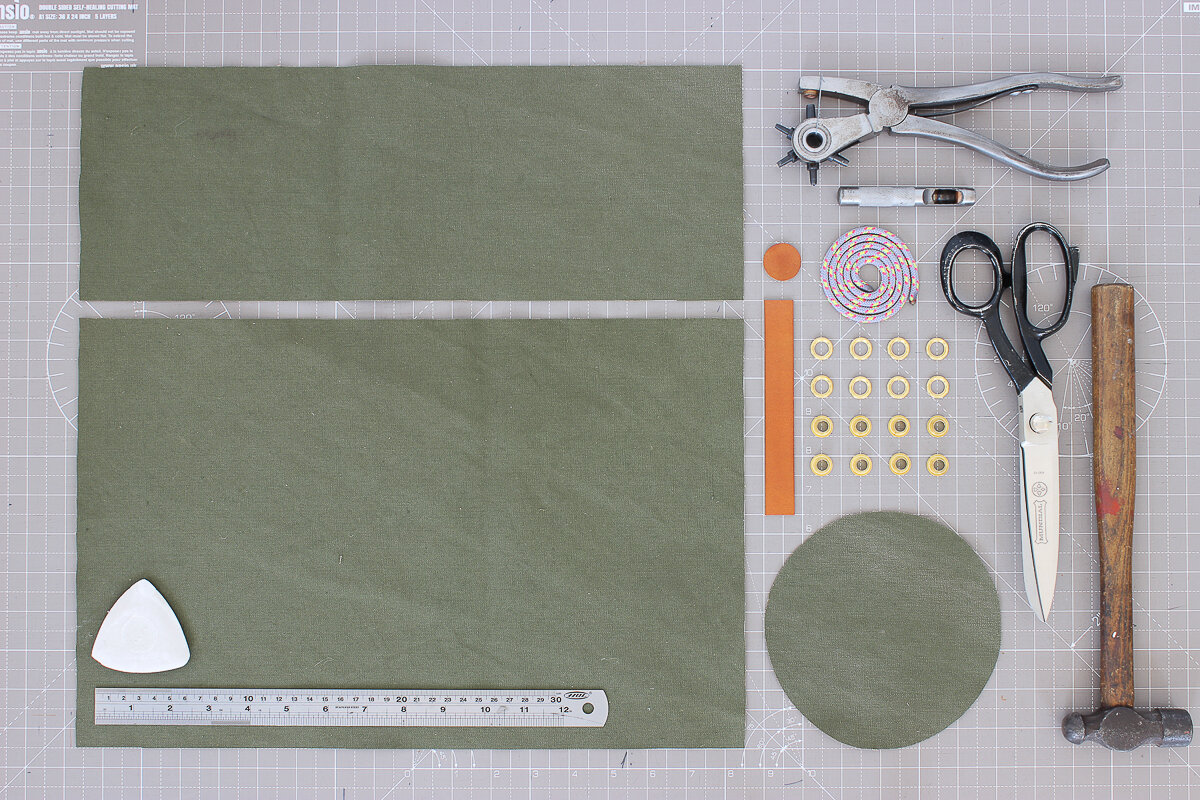
Materials:
12 - 16 oz waxed canvas - roughly 65cm x 45cm.
Leather - 2.5cm x 17cm
4mm cord or rope (we've used Beal Accessory Cord) - 60cm length
8 x Hipkiss Brass Eyelets - 5/16" (7.94mm) diameter
Strong sewing thread
Tools:
Sewing machine
Scissors, craft knife & cutting mat
Ruler and chalk (or water-soluble fabric marker)
Rotary hole punch
Eyelet tool (you can buy a pack of Hipkiss eyelets that comes complete with it's own tool).
Abbreviations and notes:
WS = Wrong side / back / inside of fabric
RS = Right side / face / outside of fabric
Unless otherwise noted, seams to be sewn with a 12.5mm (1/2") seam allowance and all stitching is done with a straight stitch, reversing a couple of stitches at the beginning and end of each line of stitching to lock the thread in place.
Right…. lets make!
Step 1
With a pair of scissors, cut out the following three panels of canvas fabric: Main panel (MP) - 43.5cm x 28cm; Inside pocket panel (PP) - 43.5cm x 16cm; Base panel (BP) - 15.5cm diameter circle.
On the wrong side (WS) of the main panel (MP), mark two lines parallel to one of the long edges, 2.5cm and 8.5cm from the edge.

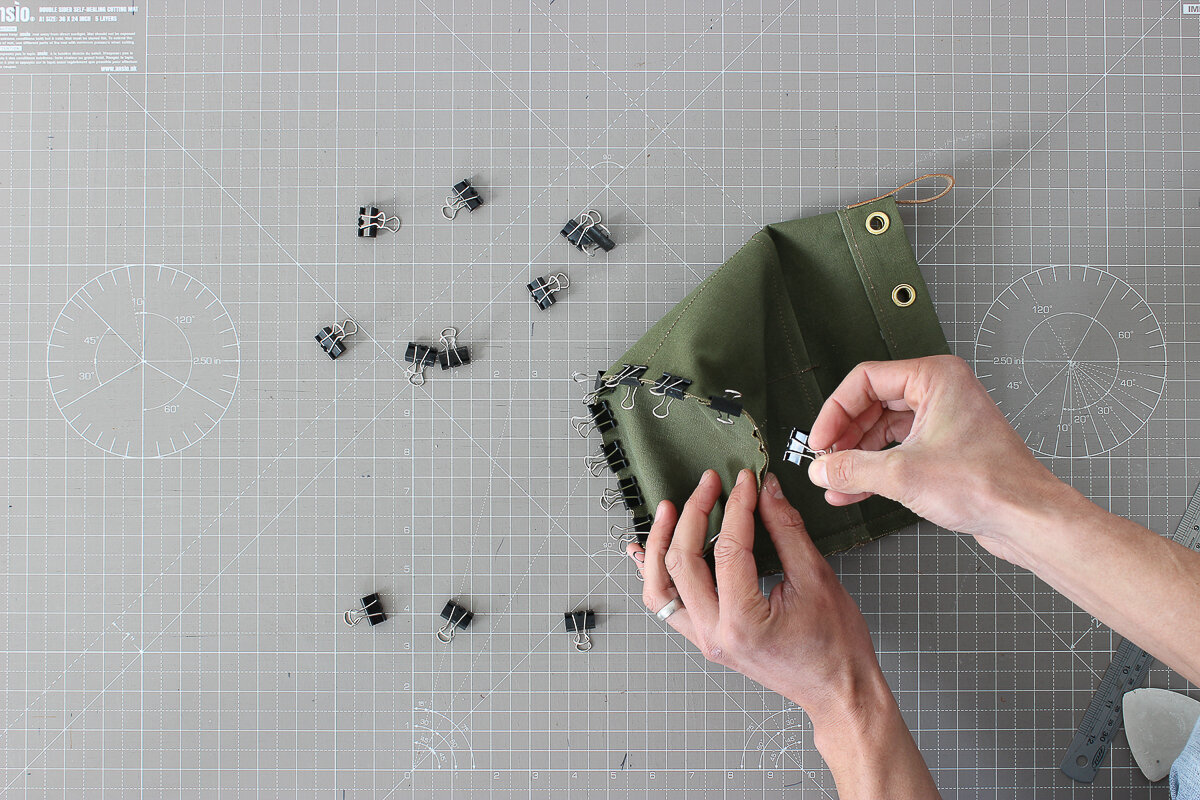
Step 2
Fold the edge of the fabric over to line up with the first line, press, then fold again to line up with the second 8.5cm line and press again. This is going to be the top seam of the bag. Either pin or clip the folded seam in place and sew with a scant 3mm (1/8") stitch line from the bottom edge of the folded seam.
On the WS of the inside pocket panel (PP), mark a single line parallel to one of the long edges, 3cm from the edge. Fold the edge of the fabric over to the line and press. Pin or clip the folded seam in place and sew with a 3mm (1/8") stitch line from the raw edge of the fabric.

Step 3
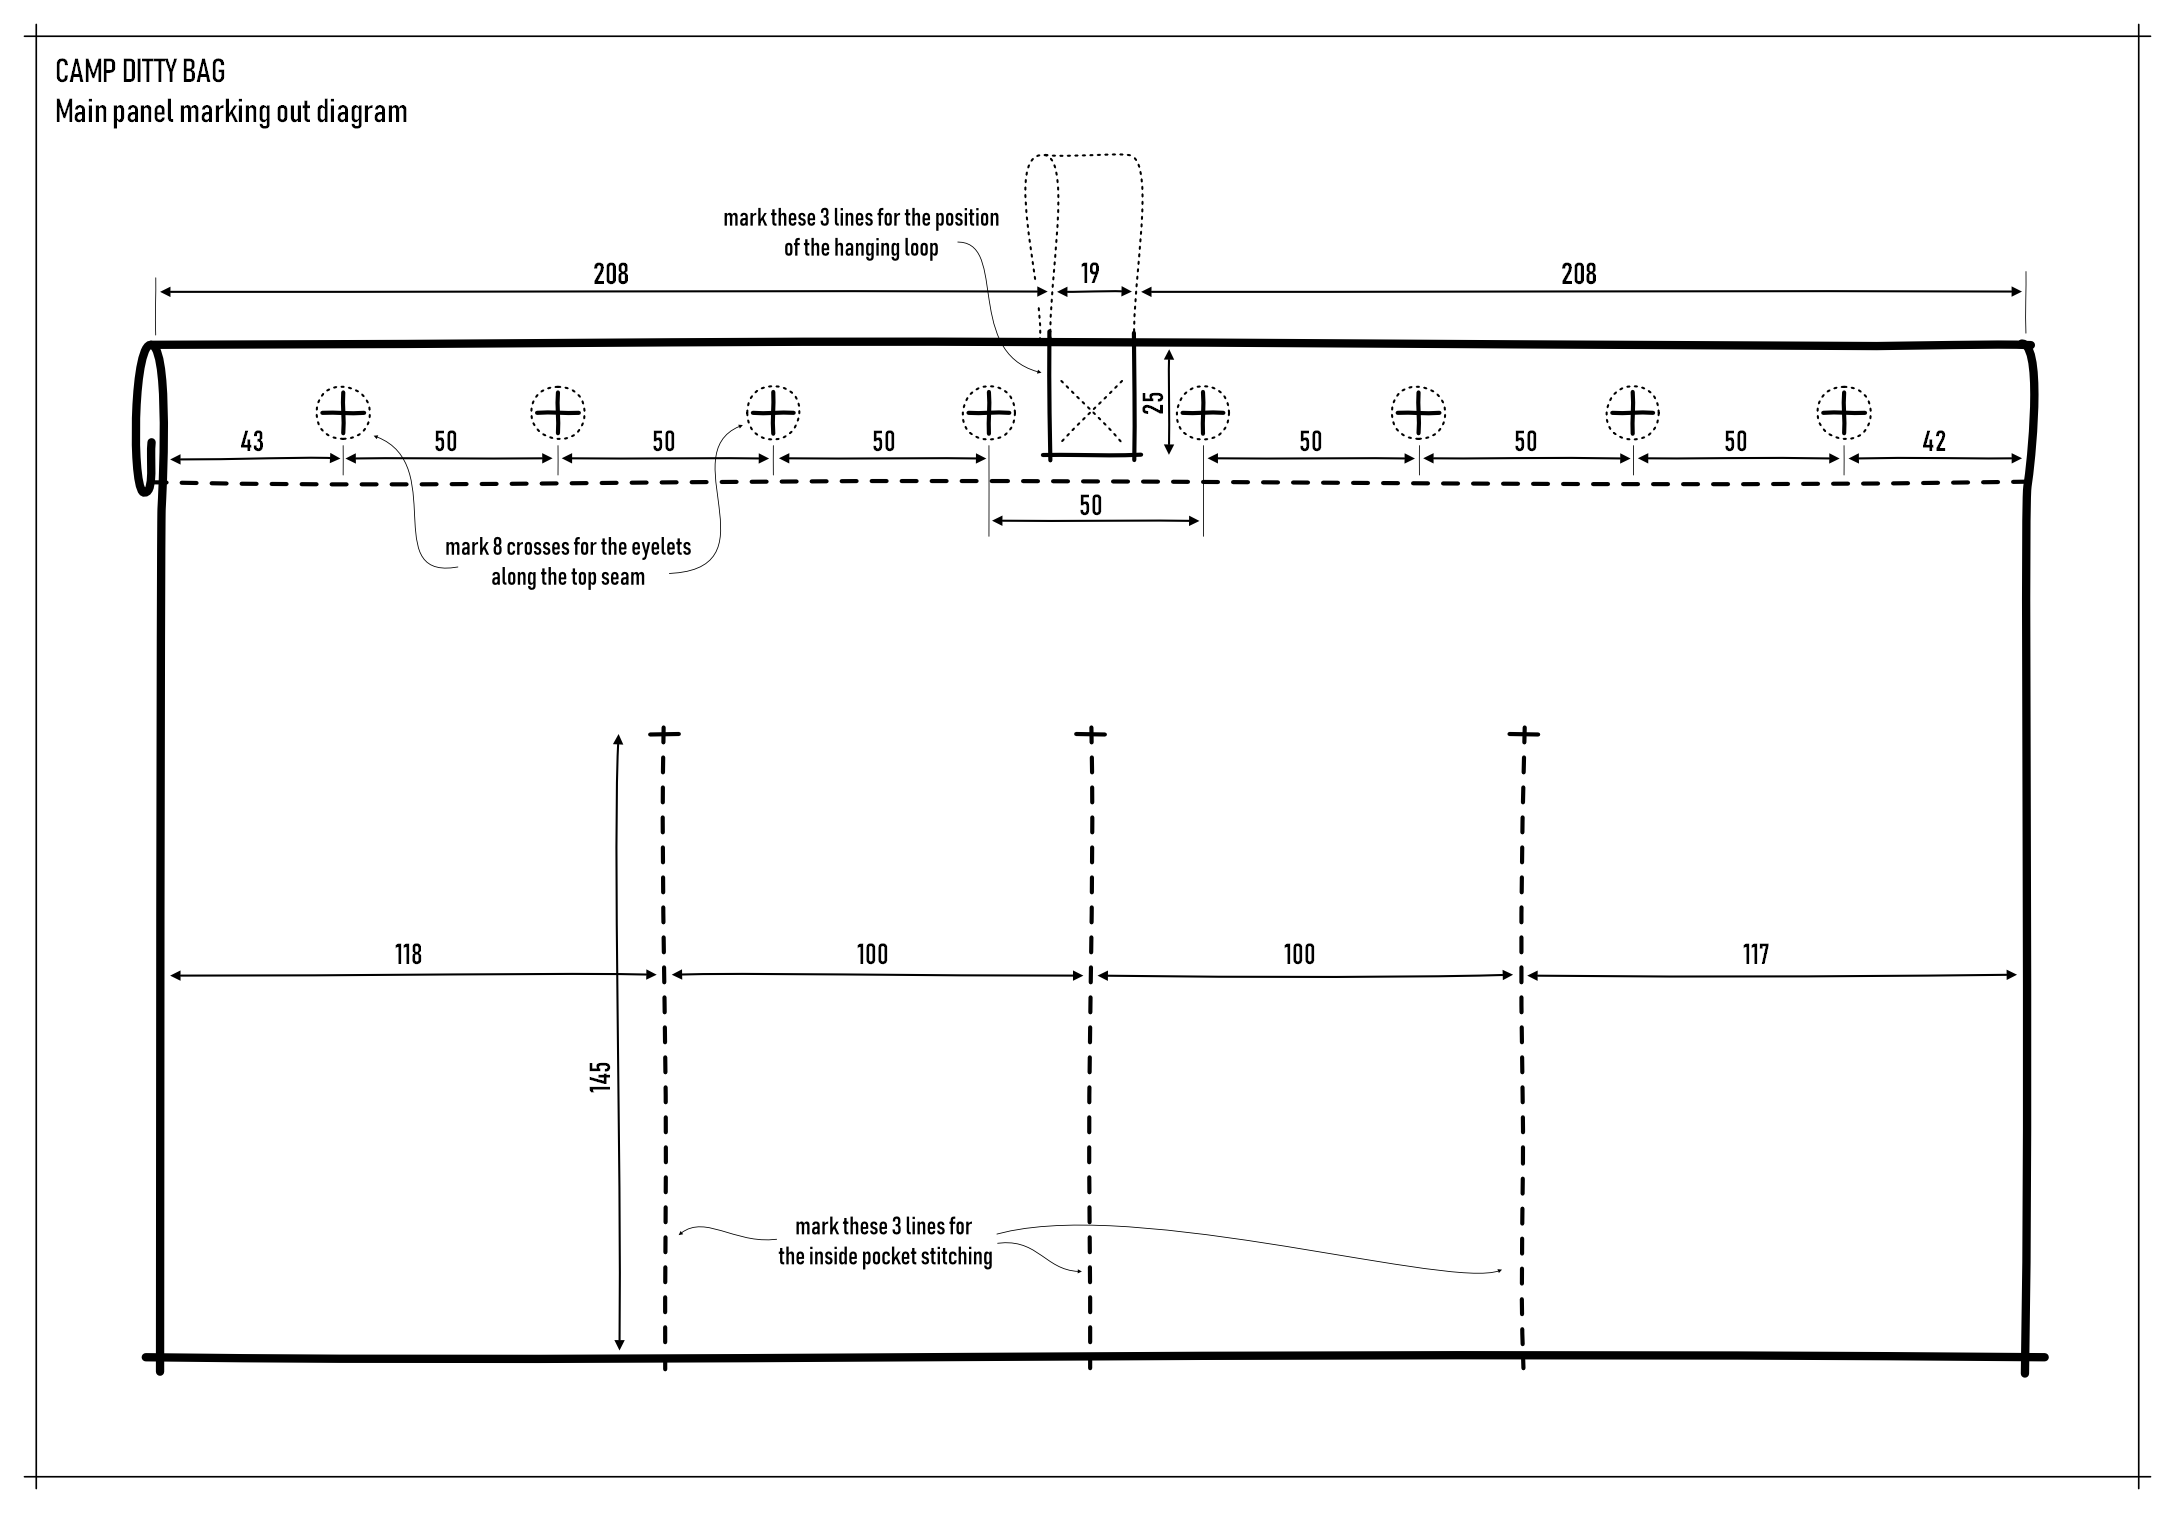
On the WS of the MP (are you getting the hang of these abbrevs yet?!), mark positions for the eyelets, pocket stitching and hanging loop as per the diagram below.

Step 4
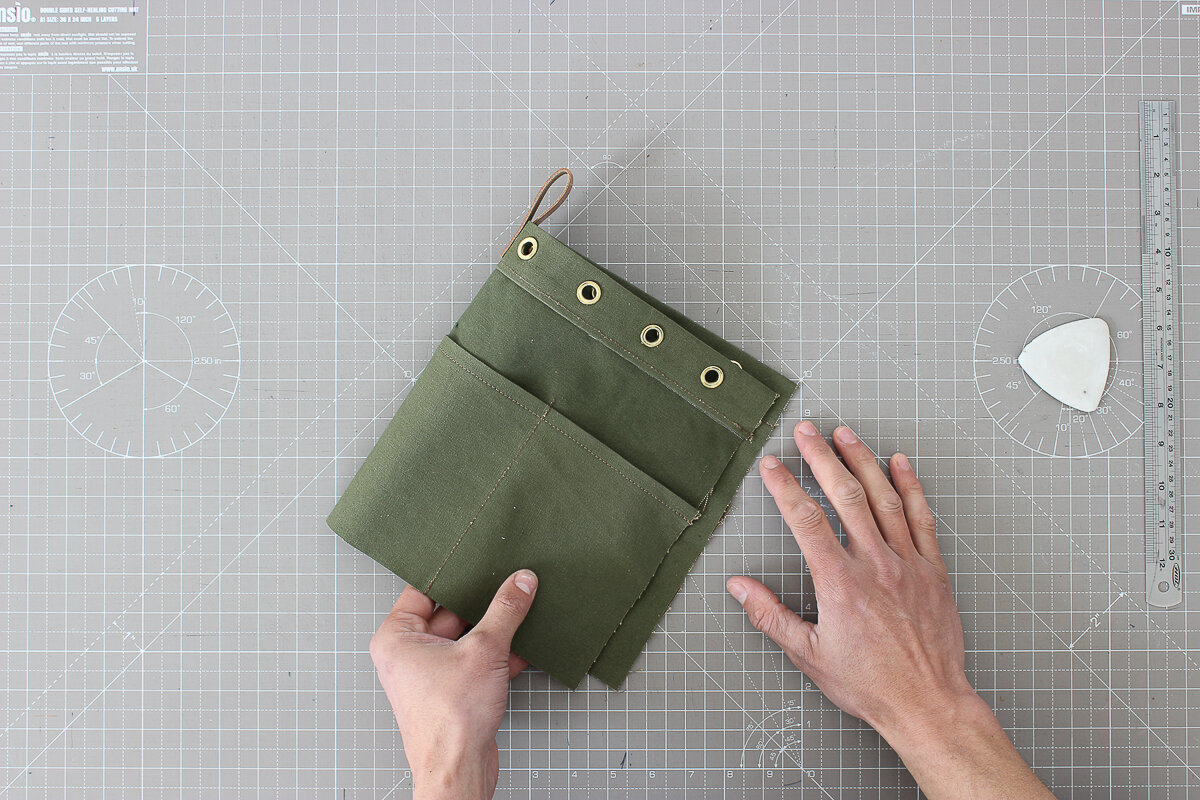
Using the eyelet tool, punch 8 holes along the top seam (the ones you just marked), and fix all eight eyelets to the fabric.

Step 5
With WS's facing each other, line the PP up with the side and bottom edges of the MP and pin or clip in place. Sew the two panels together by sewing the three pocket stitch lines marked earlier.

Step 6
With a sharp knife and cutting mat cut out a 19mm x 140mm strip of leather for the hanging loop. For an alternative hanging loop, you could use a scrap of nylon webbing or you could sew a loop out of some spare canvas.
Mark two diagonal lines on one end of the leather hanging loop as a guide for stitching as the diagram below.


Step 7
Fold the loop in half, line it up with the mark central to the top seam, with one end of the loop on the outside and the other on the inside of the seam and stitch with a cross. You may need to turn the sewing machine by hand to get through the leather and for control. Alternately you could make a hanging loop out of some spare canvas, or a small length of webbing and sew this on instead (you could also hand stitch or rivet any kind of strap to the top of the bag).

Step 8
Fold the MP in half with RS's together, clip or pin in place and sew the side seam from top to bottom with a 12.5mm (1/2") seam allowance. Push out the seam, so you have a roughly cylindrical shape.
Step 9
Now for the trickiest bit. With RS's together loosely clip or pin the round base panel (BP) to the bottom edge of the MP.
Step 10
Sew the bottom seam with a 12.5mm (1/2") seam allowance. Sew a couple of stitches at a time, keeping the bottom egde of the MP in line with the sewing machine foot and rotating the BP every few stitches making sure to keep the edge of the BP aligned with the bottom edge of the MP. Work your way around the base seam until you get back to where you started. Good luck, and don’t worry if it doesn’t quite meet - it’ll be fine!

Step 11
Along the top edge of the bag, press the side seam flat against the inside of the bag, making sure to press it in the same direction as the lay of the side seam where it joins the base panel. Sew a short stitch line 4cm in length, in line with the side seam of the bag, starting from the top edge of the bag and 6mm (1/4" ) in from the side seam in order to keep the side seam flat against the inside of the bag.

Step 12
Turn the bag the right side around and push out the base and side seams.

Step 13
For the leather cord lock, cut or punch a 2.5cm diameter circle from a scrap of leather. Mark a square 8mm x 8mm central to the round leather circle, and punch 4 x 5mm holes, one on each corner of the square (see diagram below).


Step 14
Cut a 60cm length of 4mm rope or cord (we've used an offcut of some Beal Accessory Cord), sealing the ends with a hot knife or candle. Starting from the outside of the bag and through one of the eyelets to the side of the bags side seam, thread the rope in, then out, in then out, until you end up coming out of the eyelet on the opposite side of the side seam (whoa that got a bit sidey right there!).

Step 15
Thread both ends of the rope through the leather washer, threading it through the back of the first hole, and out the second hole. And yes that is my knee in the bottom corner of the photo - I was working on the floor like all good people do, trying not to jog the tripod!

Step 16
Tie both ends in an overhand knot and you're done! Time to pack your ditty bag up and go camping - well, once we’re through to the other side you can. In the meantime you can dream all about that perfect camping trip. Enjoy!